Creating your Personal Signature
ReviewNprep introduces a personal signature where you can choose to control the visibility of your social data available to the employers. Now get a unique opportunity to create a repository of all your social channels along with your resume in one place giving it a chic blend.
You can share the custom link with the employers/recipients on demand and have your data stored in one place. Hassle-free communication on the go.
Follow the steps below to get started with creating your personal email signature.
- Log into your RNP Student Account and navigate to your Student Dashboard. Click on My Profile and kindly locate the Personal Signature tab.
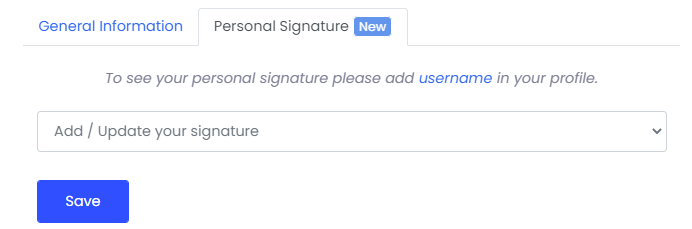
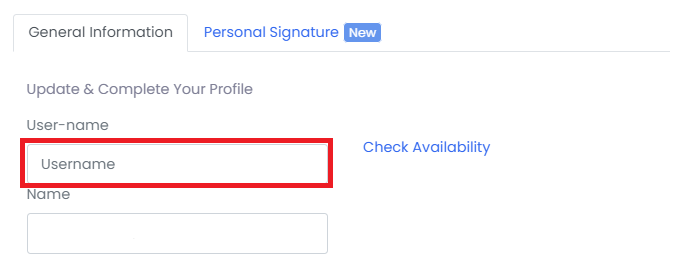
- In order to view your personal signature, you need to add your username to your RNP Profile. Once added, kindly check its availability and fill out the mandatory fields to proceed further.
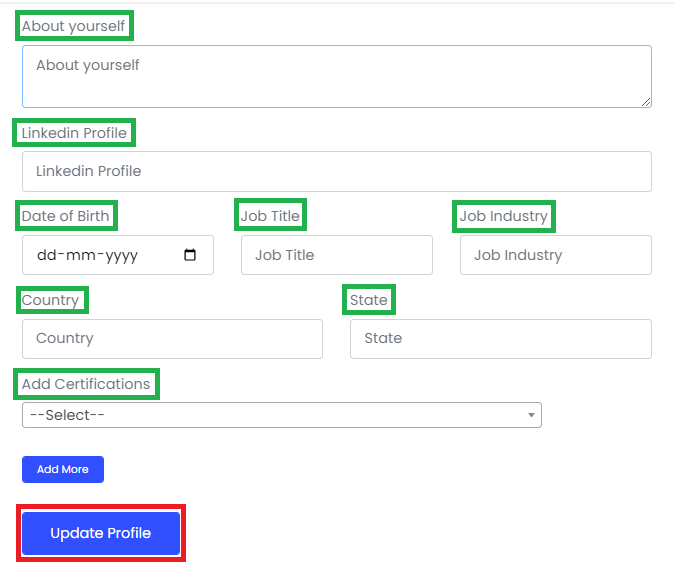
- Fill out the fields mentioned below and click on Update Profile.
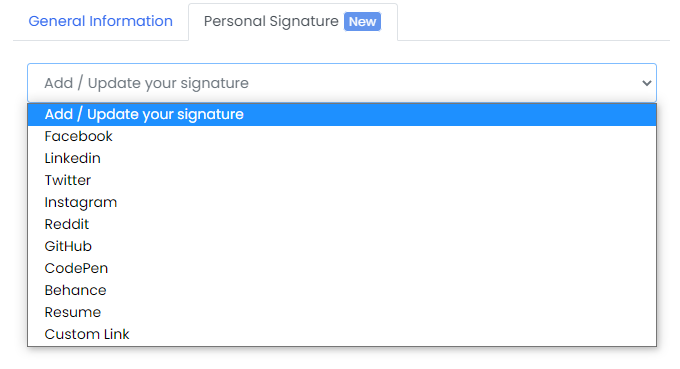
- After saving, click on the Personal Signature tab to add custom links as per your choice from the drop-down list. You can control the visibility of these links in your final signature.
- Once all the selected URLs are added, turn the toggle ON to make sure they are added successfully to your final email signature.
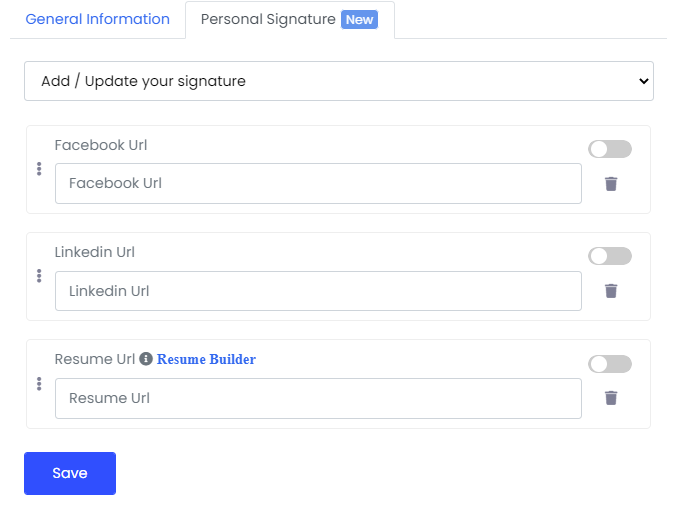
-
In terms of the Resume, you can create your custom resume with ReviewNPrep by clicking on the Resume Builder and derive a shareable link to add to your signature. Kindly visit this link or click on the Resume Builder option available next to the Resume URL.
-
Once all the links are added, click on Save. Kindly refresh the page to view your personal signature.
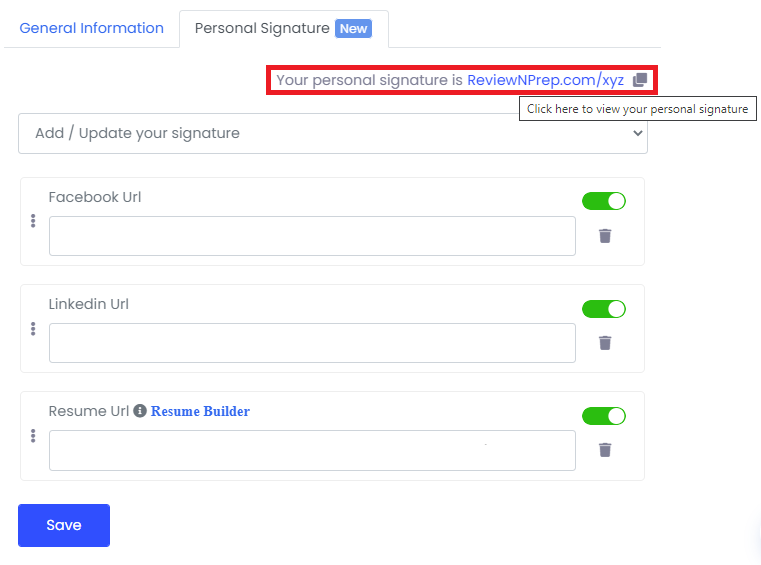
- Presenting a preview of your final signature below. A recipient can click on Contact in order to fill out a form to reach out to you. Alternatively, they can click on Socials to access your information.
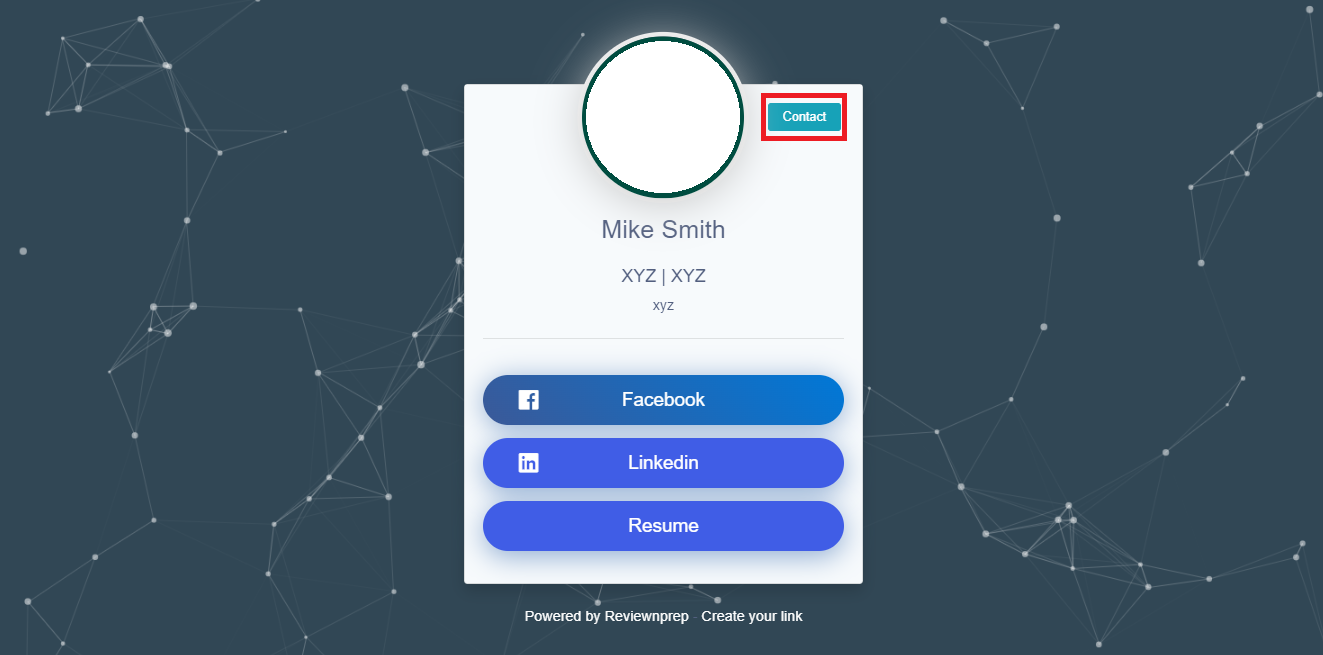

- With your personal signature, you can create a sense of identity and share this link across all possible platforms to increase your engagement.